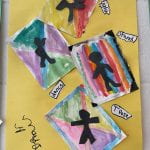
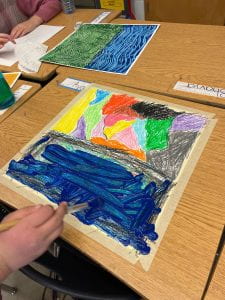
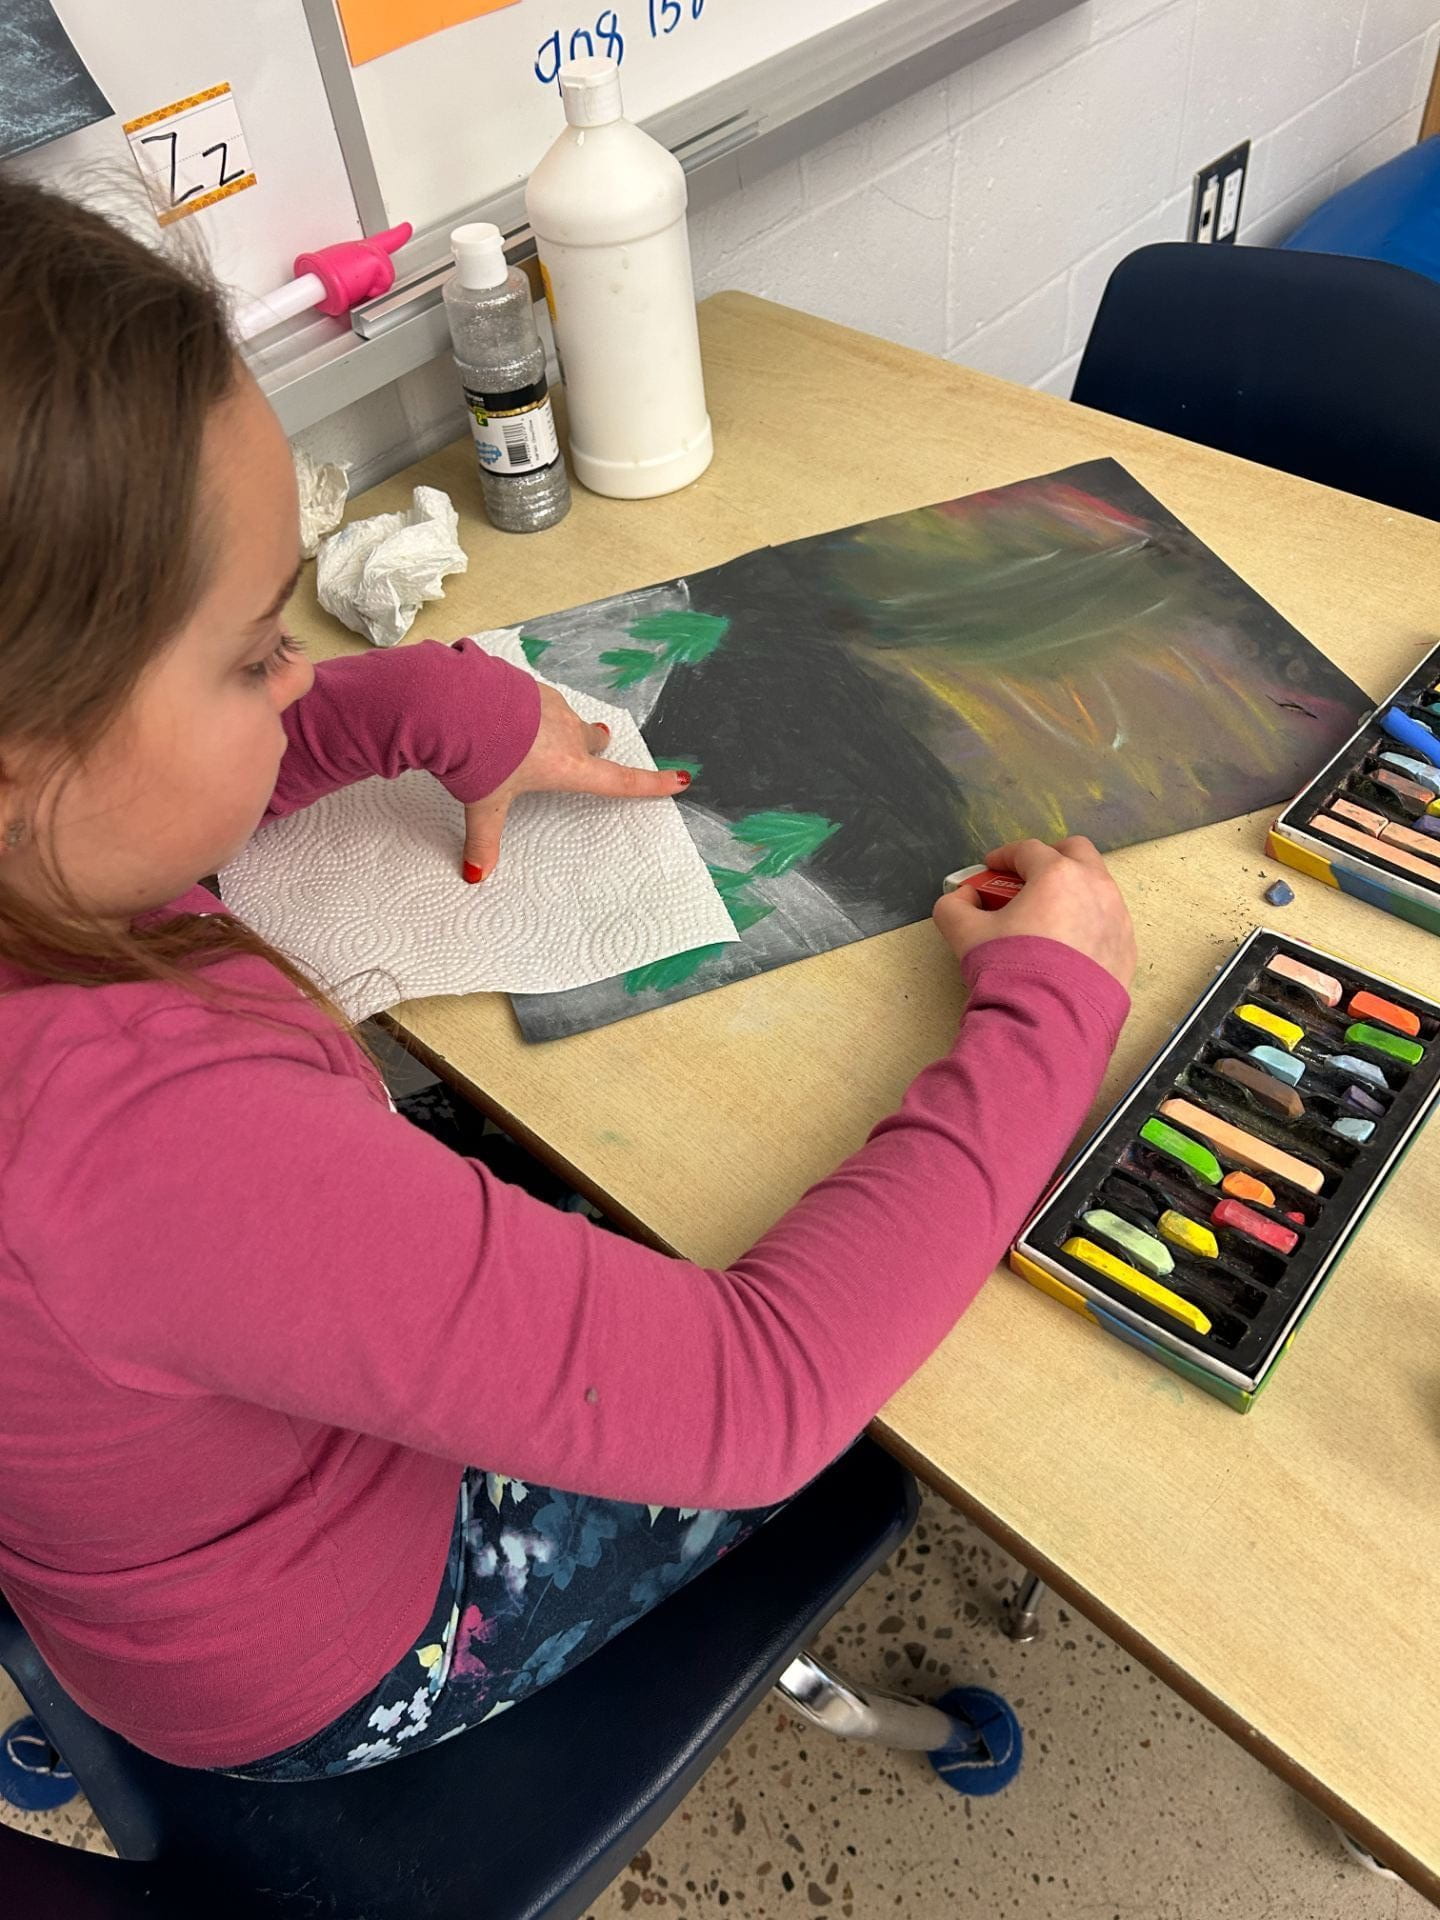
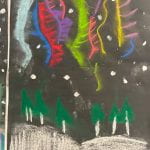
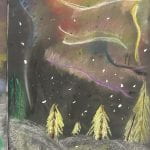
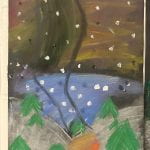
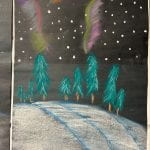
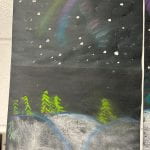
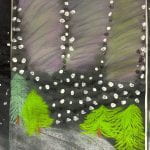
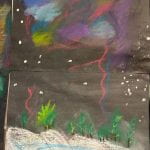
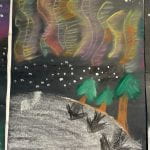
For this art project students learned to work with a new medium-chalk pastels. They first learned a bit about the northern lights. We talked about landscapes and perspective. Then we explored different techniques to use with chalk pastels.
The last step was to add some stars with paint. The results are beautiful!
On Monday we had the opportunity to go to the local high school to watch a production of “The Rainbow Fish” put on by the grade 11/12 drama production class. For many students it was the first time that they were in a theatre watching a live play. We all loved it!
When we got back we used that experience as inspiration for some paragraph writing. Together we constructed a topic sentence, brainstormed ideas for the middle, and a concluding sentence. Students then got to work writing their paragraphs independently.
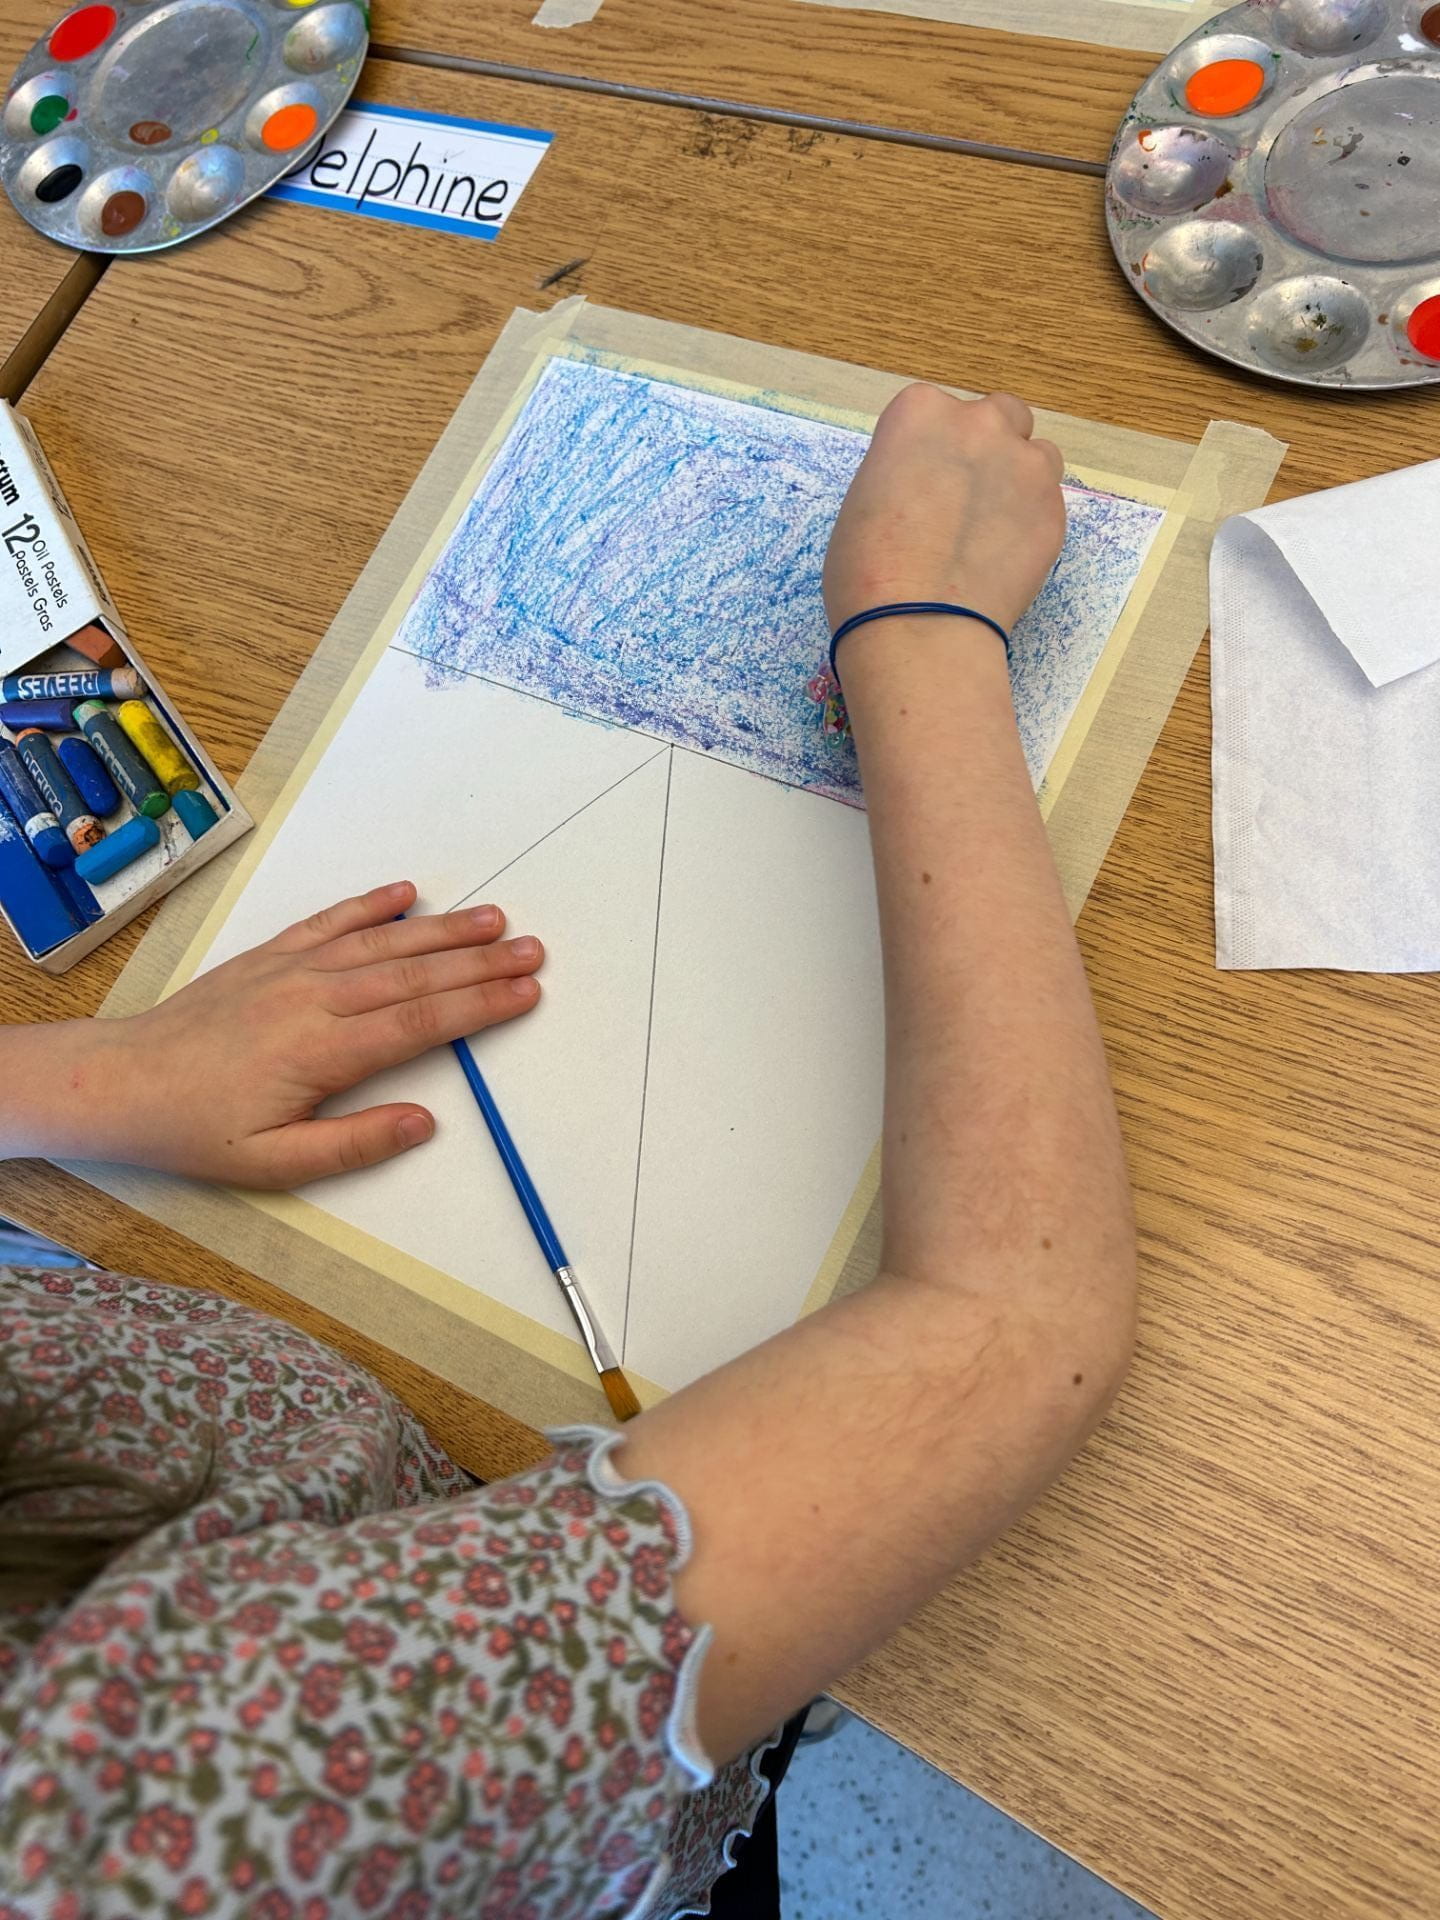
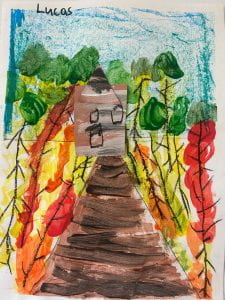
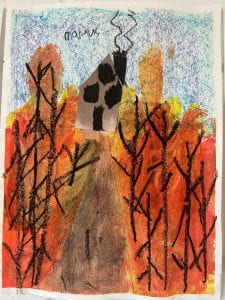
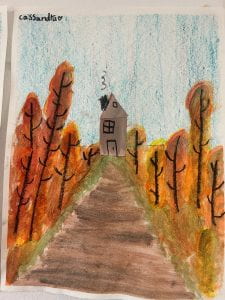
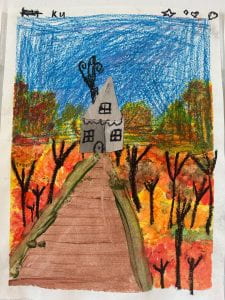
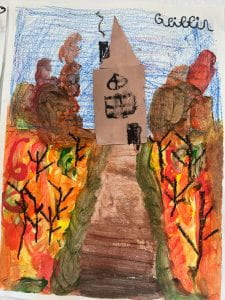
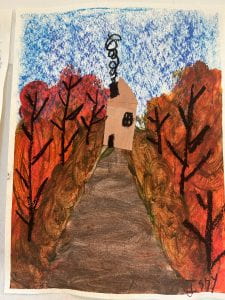
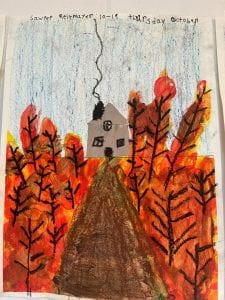
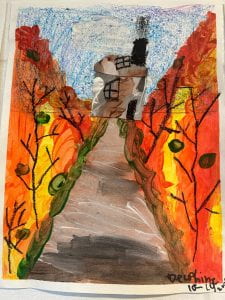
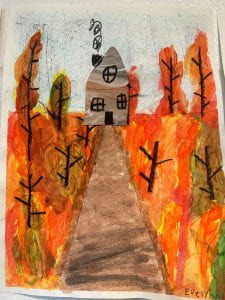
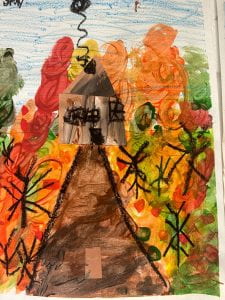
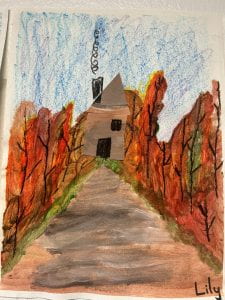
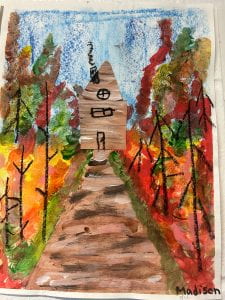
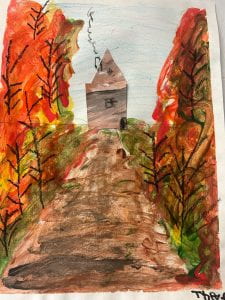
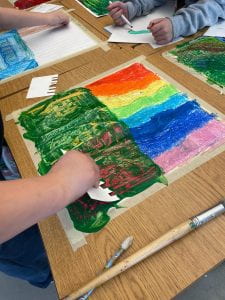
We started this project learning a bit about Vincent Van Gogh and looking at some of his art works. Then it was on to our own creating!
First, students learned about a horizon line and how the size of objects change depending on how far or near they are. Students drew a horizon line and a road/path using one-point perspective. They observed that the road narrows as it gets further away from the viewer.
The next step was to use pastels to colour the sky. Students considered texture and colour to create the sky.
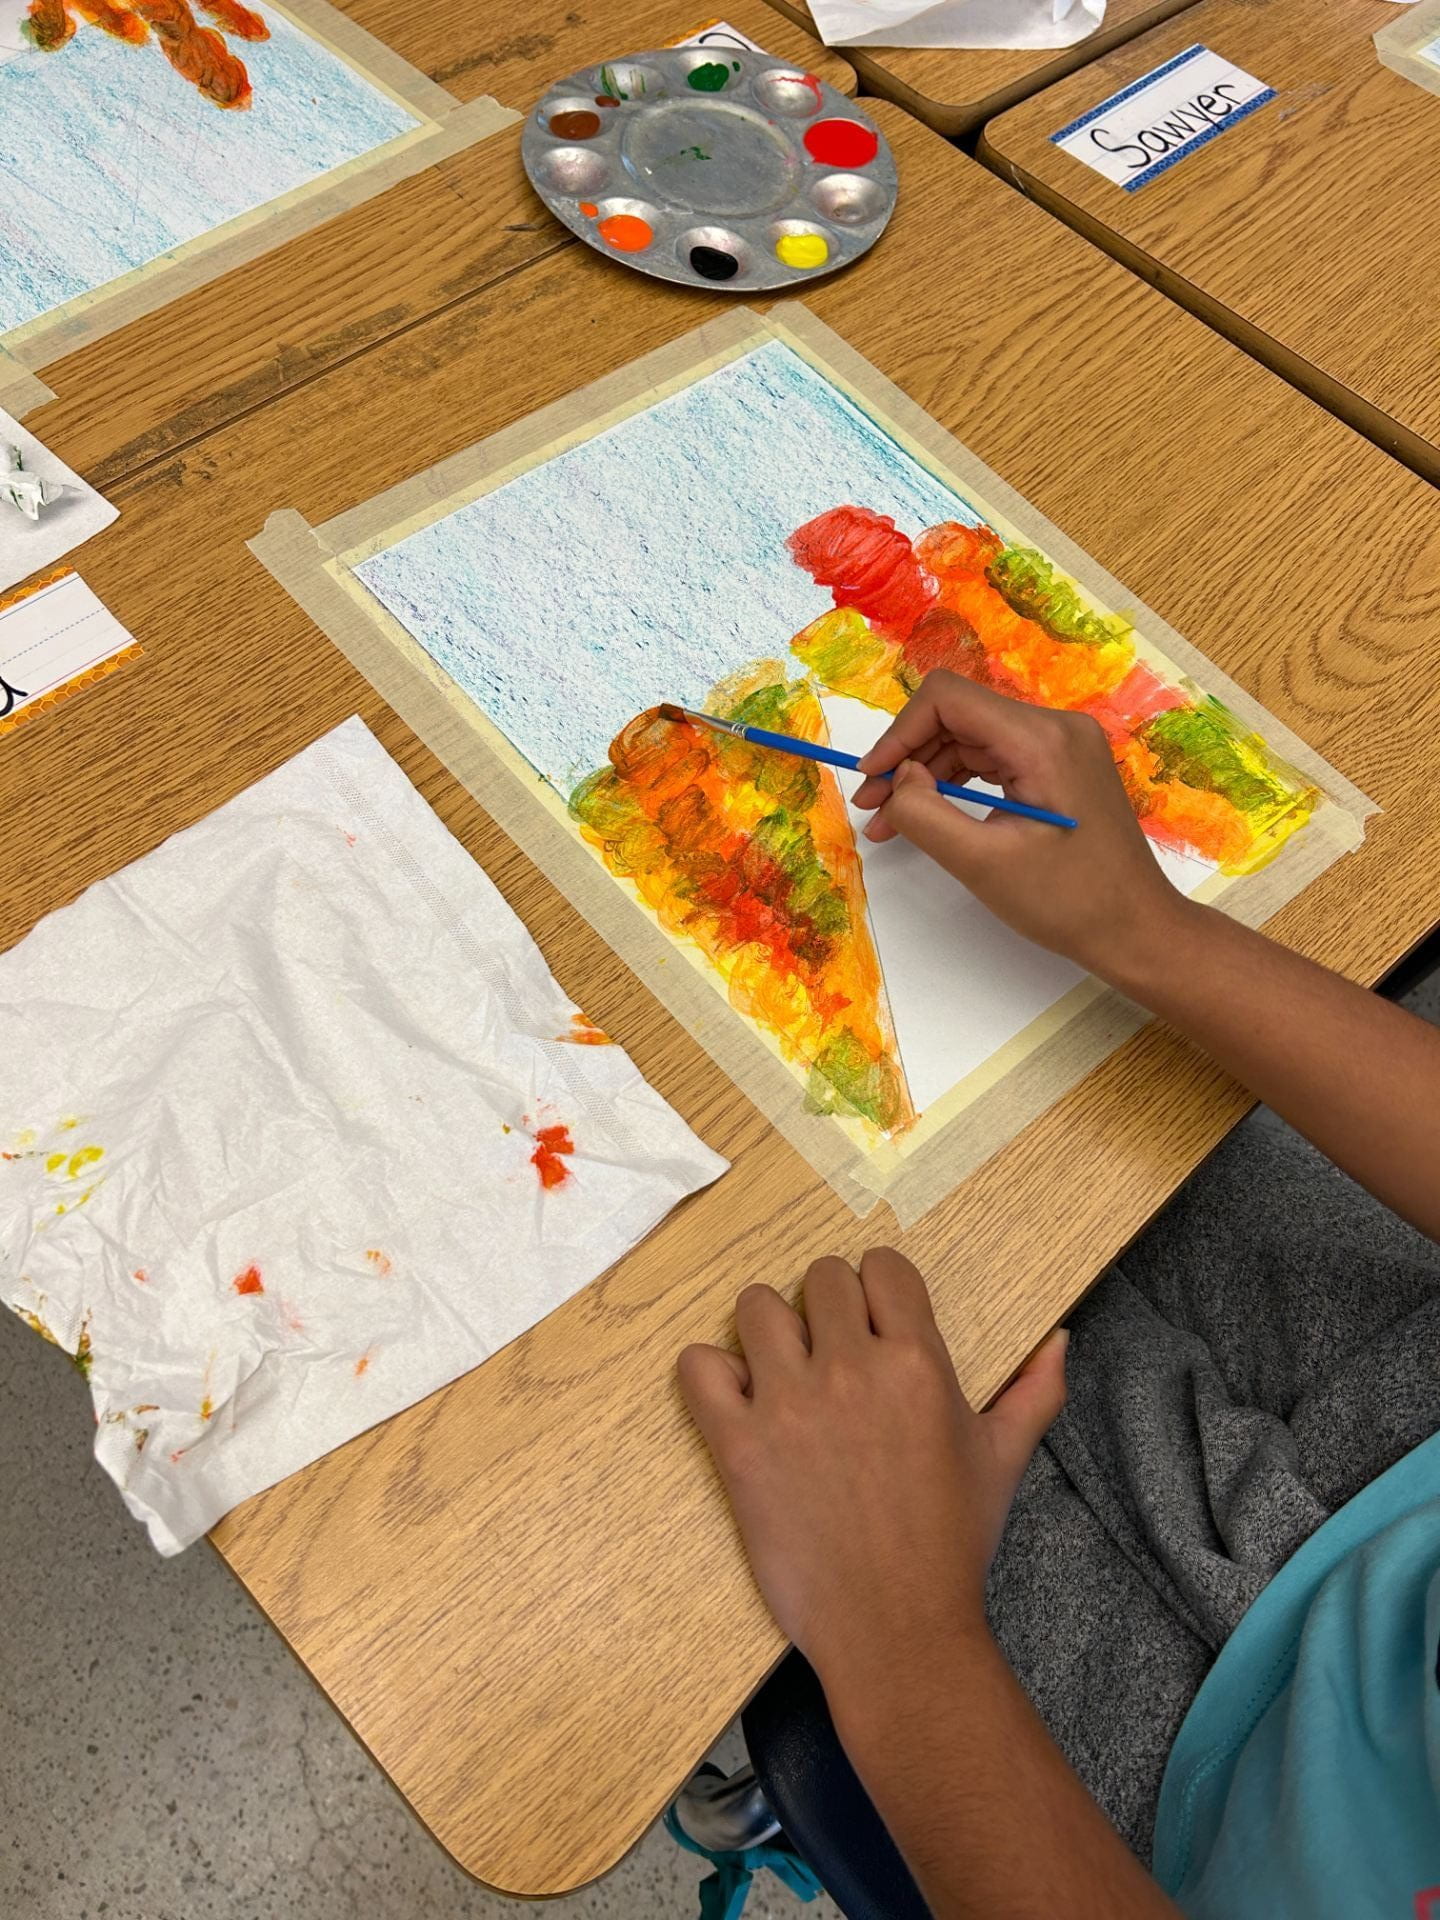
Then it was time to begin painting the foliage. Students used a circular motion and blended colours to create an Autumn scene. Painting the road/path was next. Students considered the direction of their brush strokes as well as blending colours to create their roads/paths. Students used some painted paper to create a cabin and added details with a pastel.
The completed projects are beautiful!!
Thank-you to Painted Paper Art for the inspiration
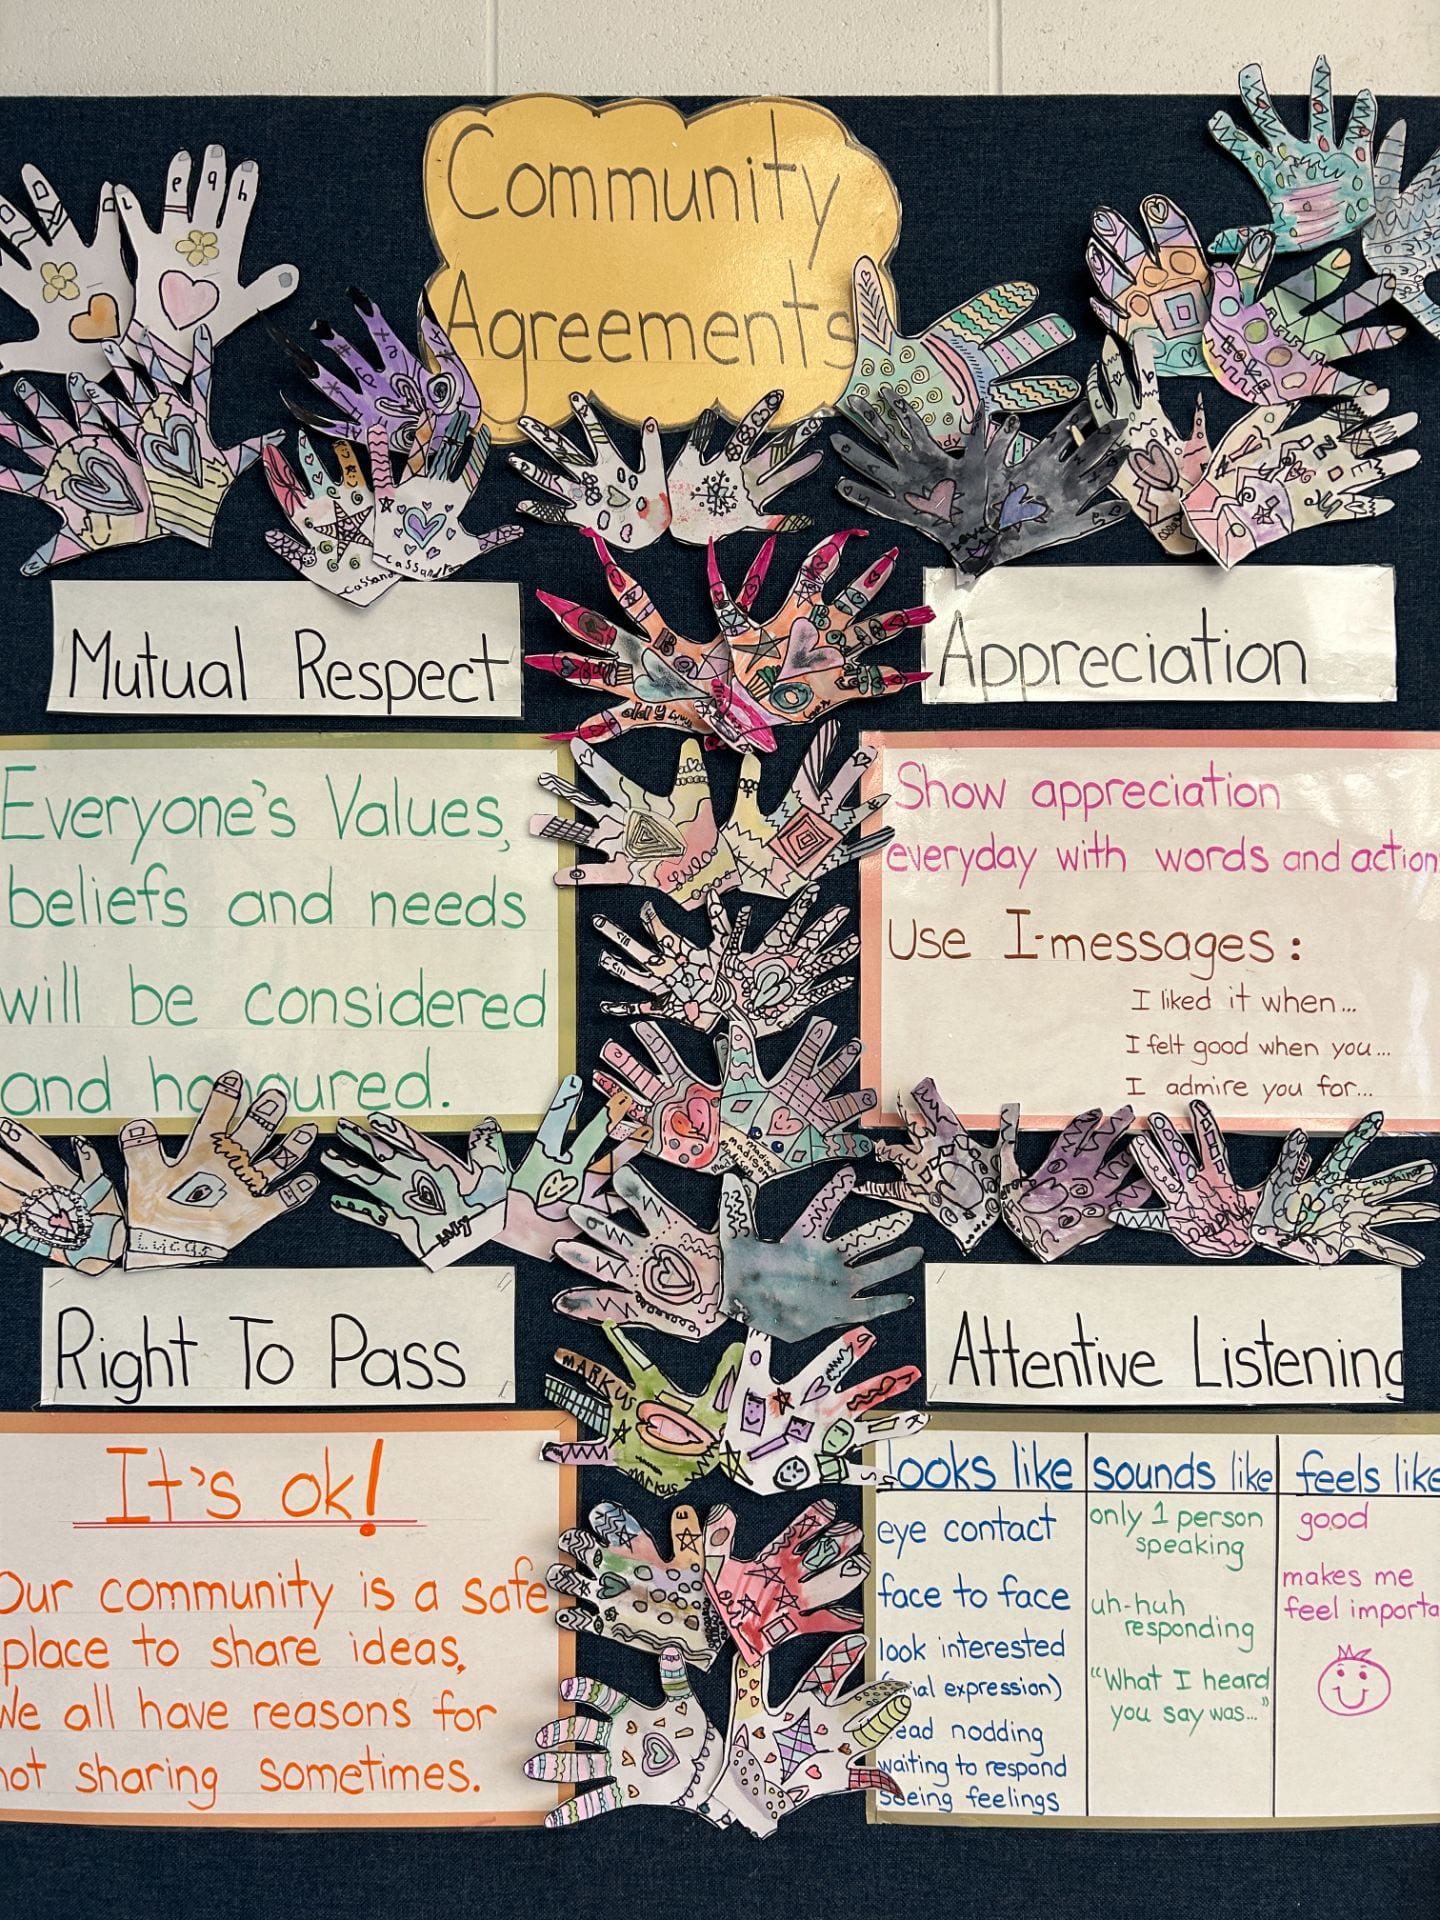
We have taken a lot of time to establish these rules so that our classroom is a safe and positive place for all to be. Today we completed an art project to “seal the deal”.
We talked a bit about hand shakes and how some people show their agreement to a deal with a handshake. So, we decided to put our hands on our Community Agreement board as a symbol of a handshake.
First students traced their hands. Then they used a variety of lines, shapes, and designs to make their hands unique. We talked about how the designs they used can reflect their personalities and show a variety of feelings. Then, students used markers, water and paintbrushes to paint their hands.
The last step was to reflect on the agreements and think about which ones were the most important. We came to the conclusion that they are all important!
For this project students first learned a little about non-objective art. We watched a video about a well known artist, Wassily Kandinsky. We then looked at several of his paintings and identified the lines and shapes he used to create different sounds and feelings.
We talked about these elements of art: line, shape, colour, space.
Students used a variety of lines and shapes to fill their paper space. Then they were given white paint as well as 2 other colours to create tints to fill the spaces on their paper with colour. The last step was to use a sharpie to go over the pencil lines.
The students certainly rose to the challenge of this creative project!
The last step was to write about their art, being sure to use complete sentences. What sounds do they hear when they look at their artwork? What feeling does their piece create? Note: This was our first attempt at writing with the chromebooks. Students were told to focus on their ideas and writing complete sentences. Spelling was to be “Have-a-go”.
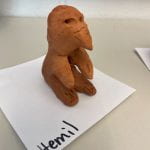
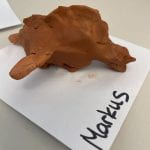
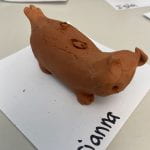
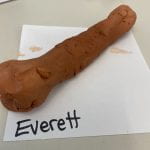
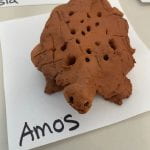
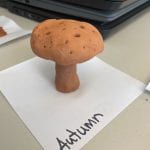
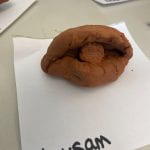
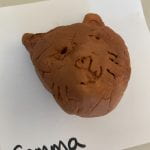
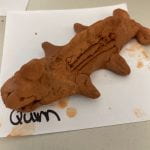
This art project started out with a social studies lesson courtesy of the Simcoe County Museum:
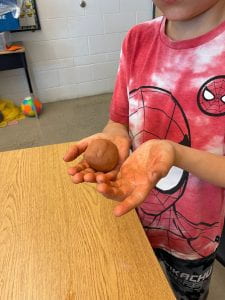
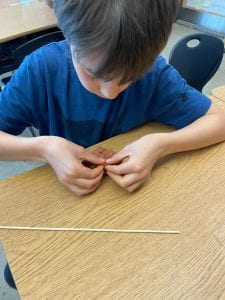
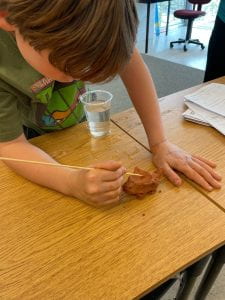
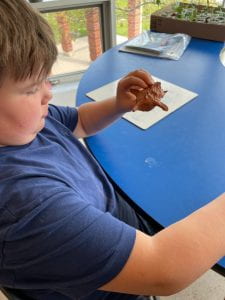
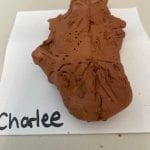
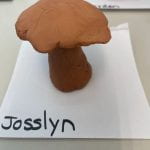
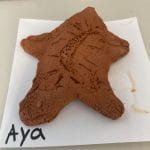
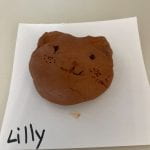
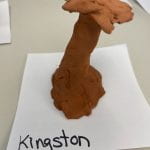
The Wendat believed that everything in the world around them, from trees to lakes to rivers to animals, possessed a soul or spirit, called an oki. Different okies could bring good or bad luck in different human activities, from travel to war to hunting or fishing to farming to gambling to relationships. • Wendat people enlisted help from a particular oki by carrying a charm dedicated to them. These charms could be highly valued and could be passed on from one generation to the next. Charms could be made or could be found in the woods, where it was believed that they had been lost by the spirit that made them. Charms could also be obtained through trade from the Algonquins, who were such good hunters and fishermen that they were considered very lucky people. • Wendat people carried their good luck charms around with them. If they needed help from their charm’s oki, they would speak to the charm and offer it beads or pieces of tobacco as presents. They could also hold feasts for their okies to make them more powerful. • These charms will be made from clay. Clay was one material that the Wendat used often to make important items like pipes and pots. They could embellish clay objects by drawing designs on them using wooden sticks.
Then it was on to creating our own okies! Students learned how to start with a ball and use a pinch method to form features. They learned how to use slip to repair/prevent cracks. Students discovered that while an artist may start with one idea for a sculpture the project may turn into something completely different as the clay starts to form.
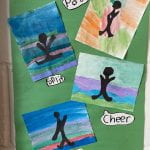
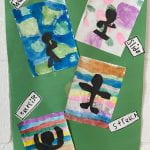
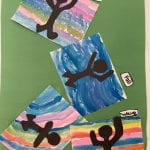
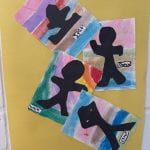
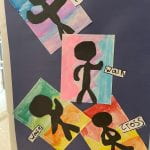
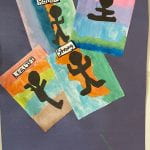
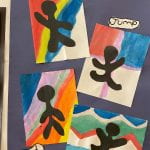
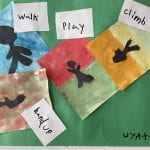
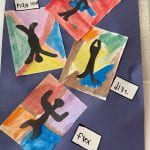
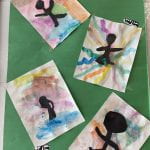
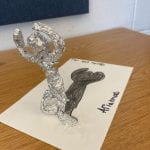
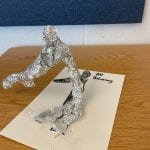
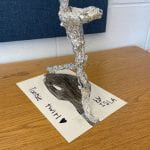
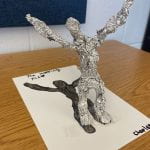
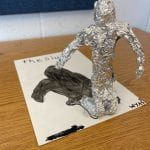
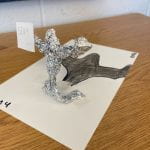
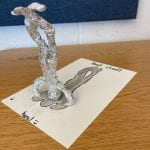
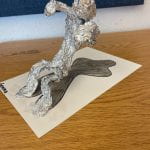
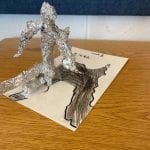
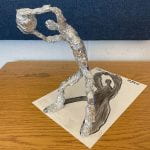
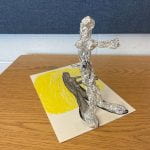
Students combined their knowledge of colour, using water-colour paint, body shape and proportion to create this project. After having created foil sculptures students had some background in creating movement in a figure, thinking about body parts and joints.
Elements of Art: Form: a three-dimensional object that has height, length, width, and depth.
Principles of Design Balance: an equal distribution of weight through the sculpture. In this lesson it’s literal balance, in
which the sculpture has a solid base and won’t tip over. Movement: the use of the elements of visual arts to draw a viewer’s eye from one point to another
in an artwork. In this lesson, it’s “implied” movement which draws a viewer’s eye from one point to
another. Positive/Negative space: the object and the area around it. In this lesson it’s the figure and the
space around it. Proportion: the relationship of parts to the whole. In this lesson, it’s body parts in proportion to
the body
Students first watched a demonstration of how to turn a flat sheet of foil into a figure. The steps were written so students could follow the directions independently when creating their own project. Students had to think about a sequence of steps. They used themselves as real-life models to explore the shape of body joints, using observation and connecting skills. Once the figures were formed, students used a flashlight to explore the shape of shadows and then drew and coloured a shadow of their figure as they considered point of view. They named their sculptures as a final step.
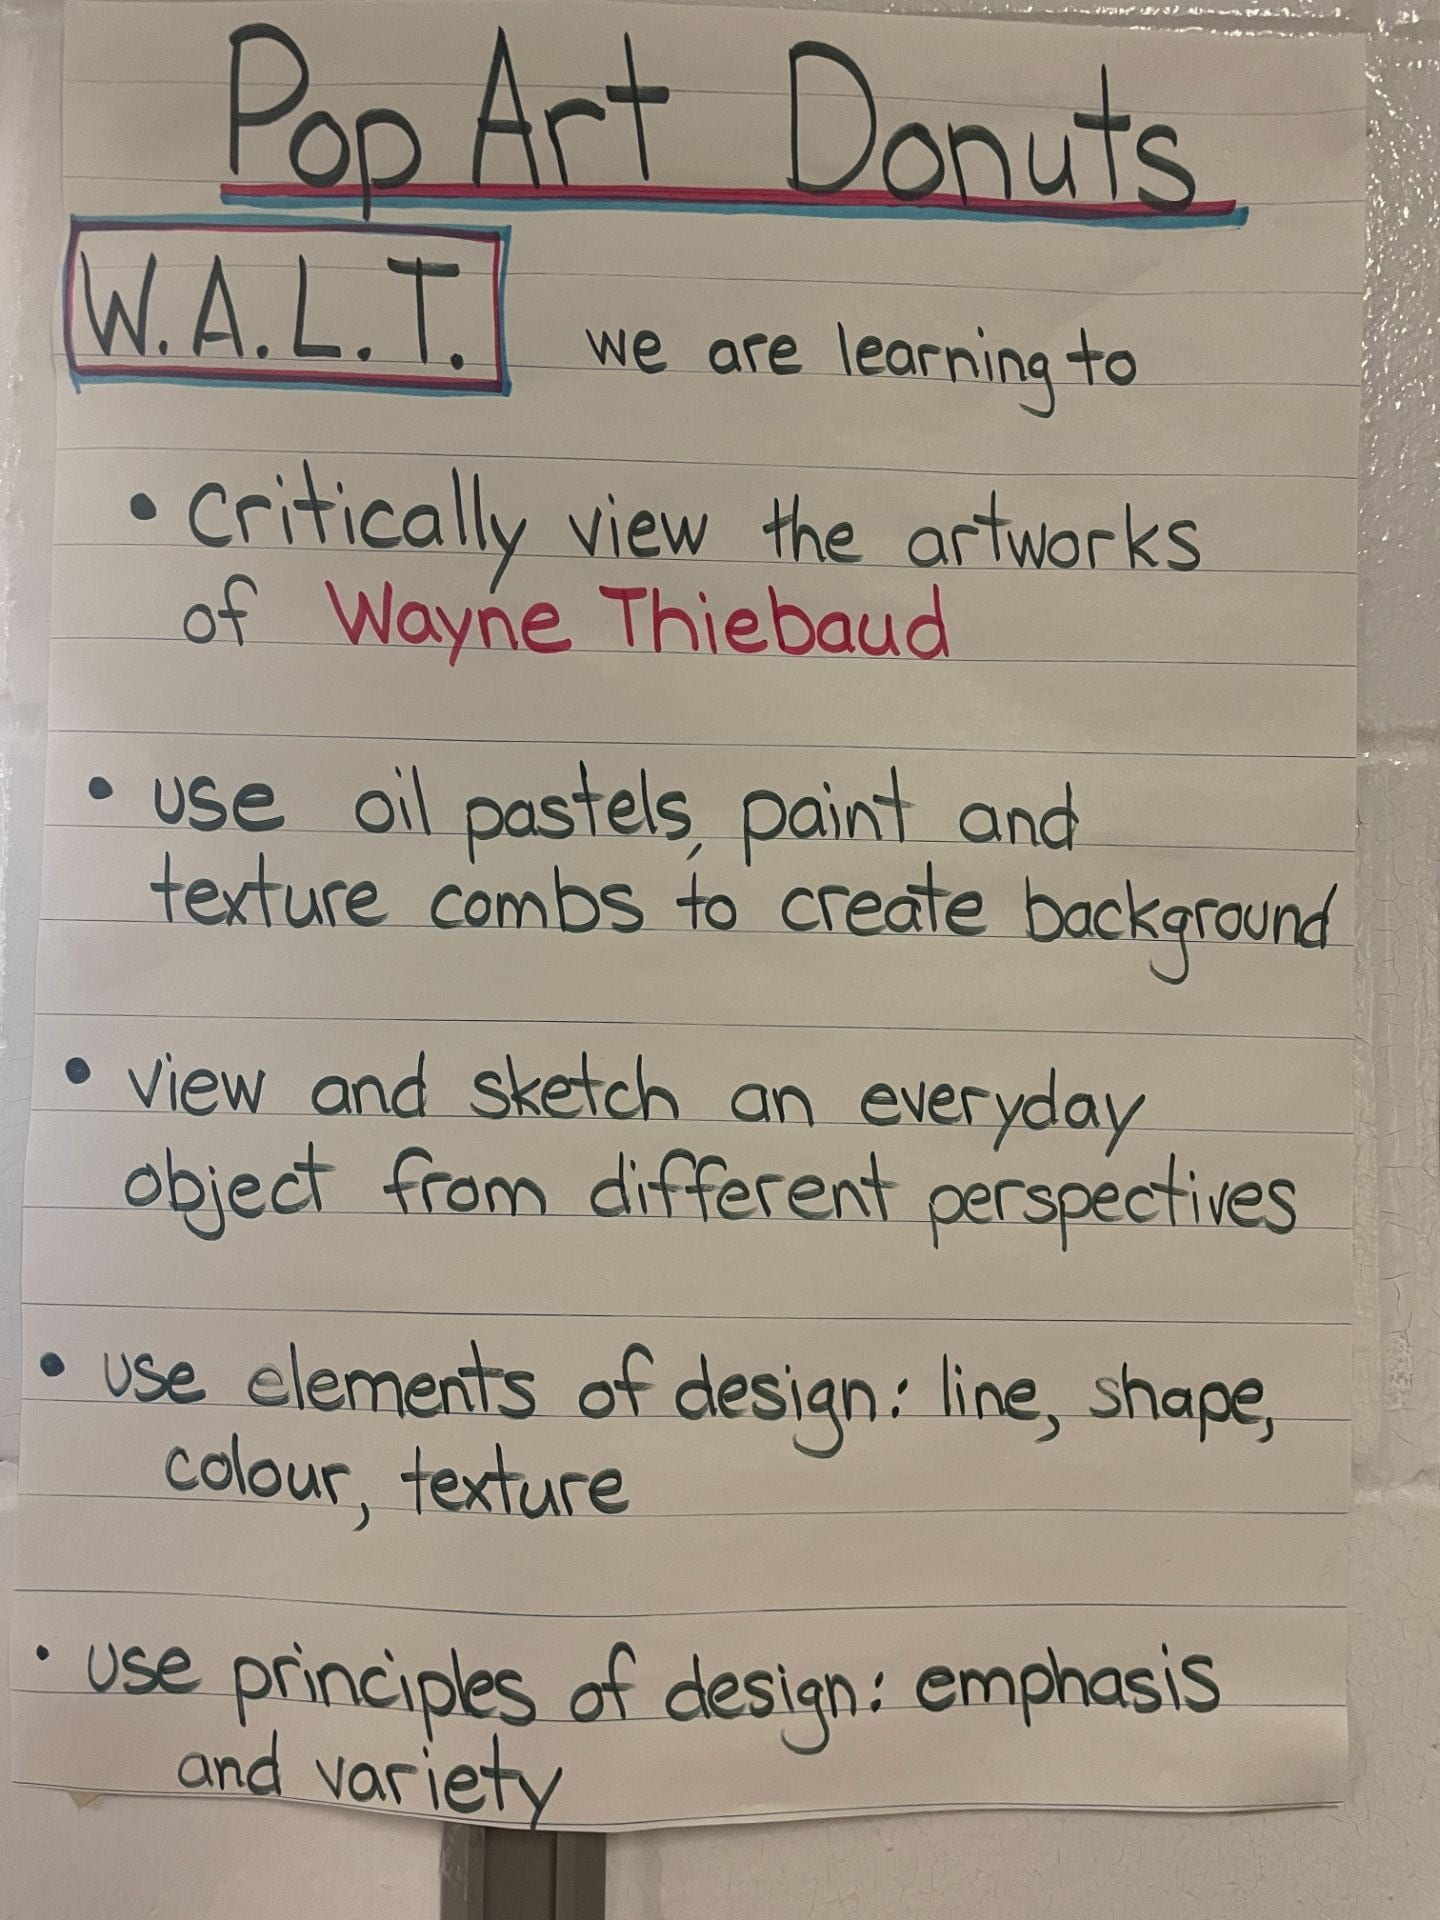
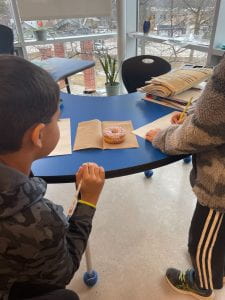
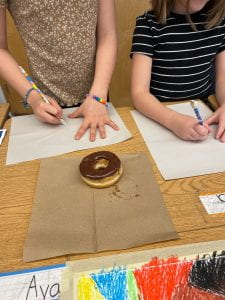
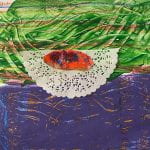
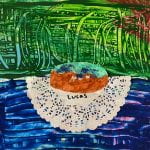
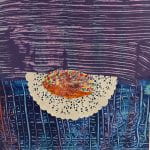
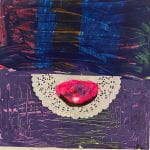
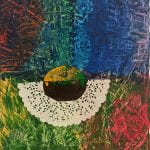
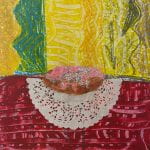
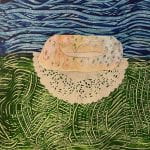
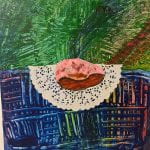
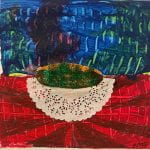
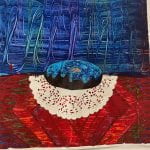
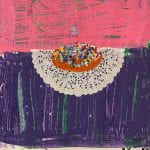
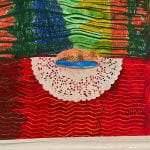
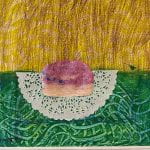
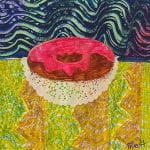
Students had a lot of fun with this “sweet” art project. It began with a look at the artist, “Wayne Thiebaud”. Students identified the subject of his paintings and discovered why he is called a Pop Artist. They looked closely at some of his paintings and identified the techniques he used – exaggerated colours, heavy shadows, and bold outlines.
The students started out with some read donuts for inspiration. They looked at them from different perspectives and had a go at sketching a bird’s eye view and a side view.
Next, they used oil pastels to colour both a wall and a table in large coloured sections. Then they painted over the pastel and used cardboard combs to pull through the paint and create texture. The next step was to create their donuts, thinking about a side perspective. They drew, coloured, glittered, and cut them out.
Everything was then assembled and some masterpieces were created!
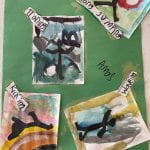
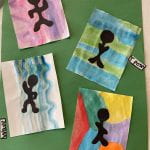
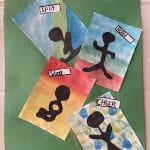
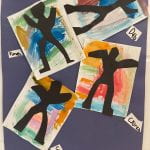
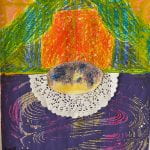
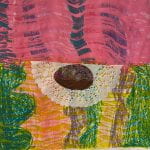
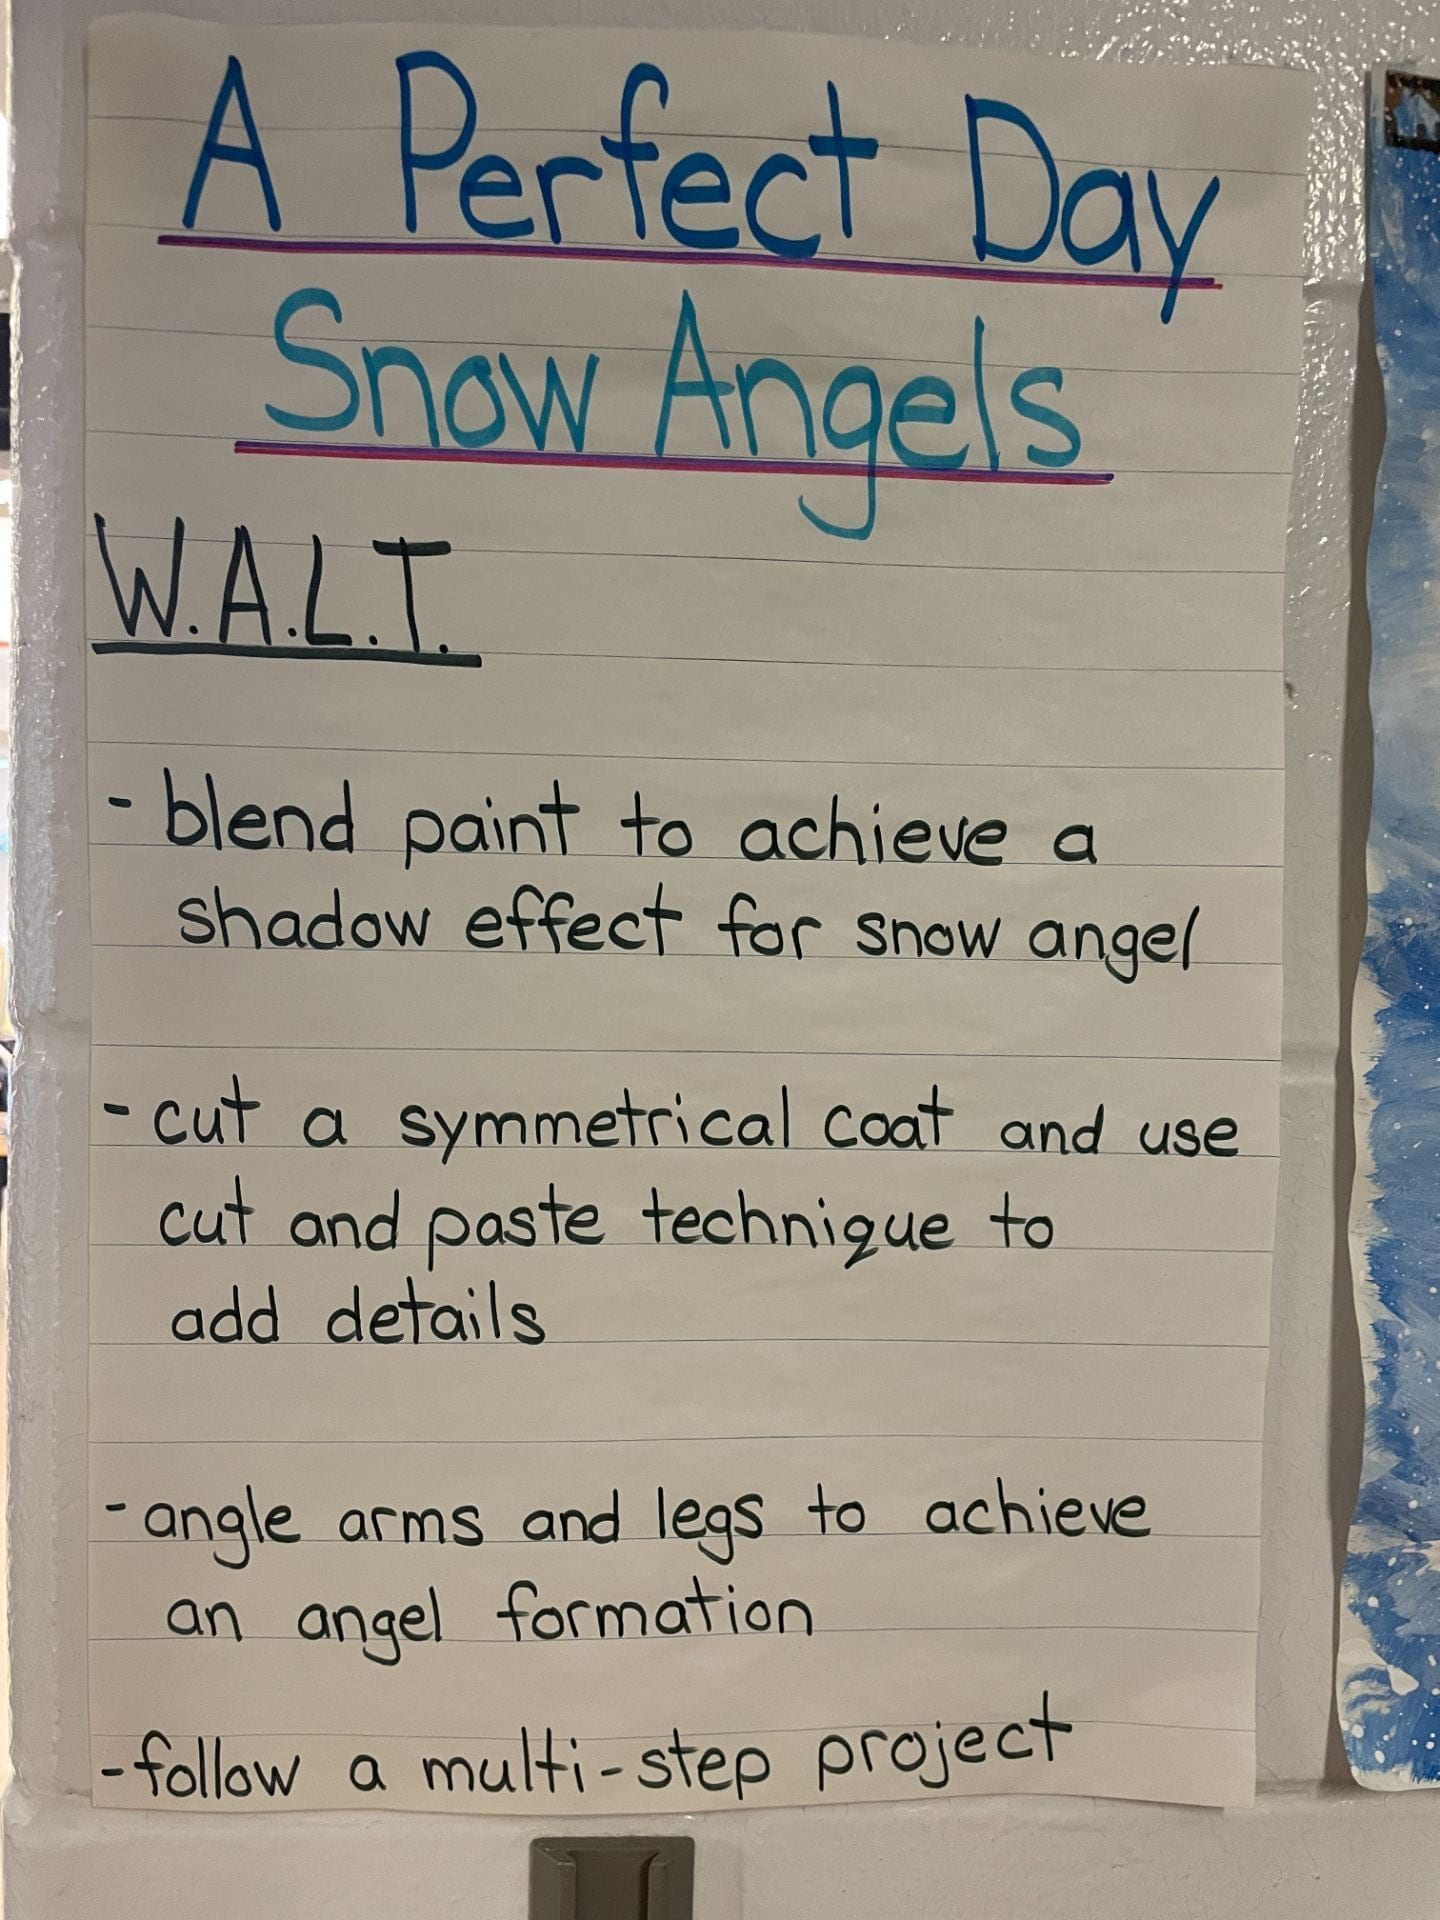
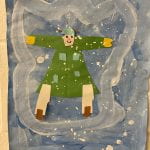
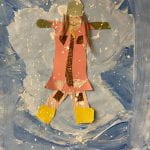
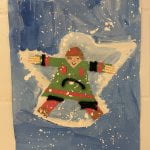
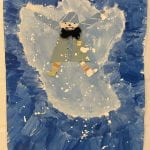
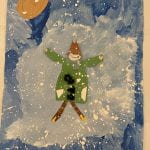
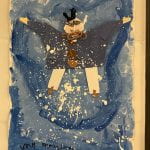
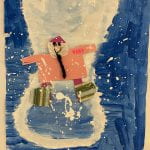
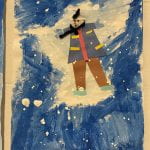
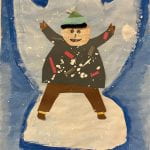
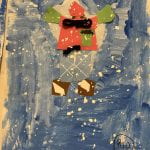
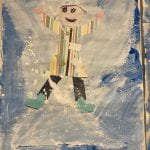
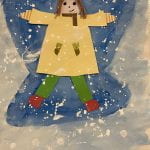
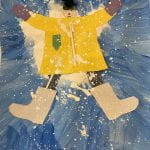
This art project began with the book, “A Perfect Day” by Carin Berger.
We enjoyed the story and then got to work examining the illustrations. We looked at how the artist created shadows using shading techniques. We looked at shapes and how the artist created movement.
Then it was time for students to begin creating themselves. They started with the background, creating a snow angel using white and blue paint. Then, they created a person. They put the two together and added some paint splatters to mimic snow. The results are amazing!

 For this art project students learned to work with a new medium-chalk pastels. They first learned a bit about the northern lights. We talked about landscapes and perspective. Then we explored different techniques to use with chalk pastels.
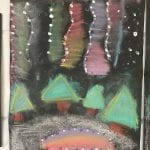


 We started this project learning a bit about Vincent Van Gogh and looking at some of his art works. Then it was on to our own creating!